


One doesn’t need to think back too far to a time when saddle options were very limited and trial and error was the accepted way to find the one for you. For some, this is still a reality that they live with. But walk in to most shops and you will now likely be greeted with one of the many saddle selection gadgets put out by saddle manufacturers in an attempt to make your saddle purchase more streamlined. Foam pads, cardboard, gel pads, pelvic calipers, body type calculators, the list goes on. Most of these tools are heavily geared around the now widely accepted “sit bone width,” that being the distance between the indentations formed by your Ischial Tuberosities when you sit on one of the gel pads and in return you are presented with a definitive, corresponding number for your “correct” saddle width.
Whilst this width gives a starting point to understanding the pelvic width of an individual, the reality is that this measurement is not overly useful for saddle selection for any application other than your upright town or dutch bike. This is because when we ride in any ‘performance’ oriented position, we are placing our pelvis in to some degree of anterior tilt, relative to a bolt upright sitting position. Therefore the engagement of the saddle is not with the Ischial Tuberosities, but more forward on to the Pubic Rami.
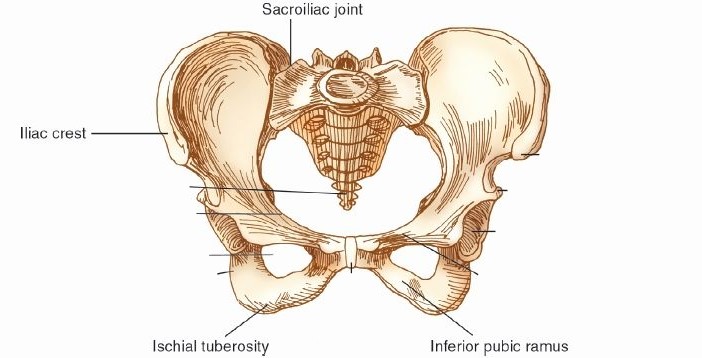
As you can see in the diagram above, as we roll forward toward the Pubic Rami, they follow a sort of ‘V’ formation, which narrows towards the front of the pelvis. For this reason, we can observe a correlation between the degree of anterior pelvic rotation and saddle width at the point of engagement. Simply put, the more you tilt your pelvis forward, the narrower the contact patch.
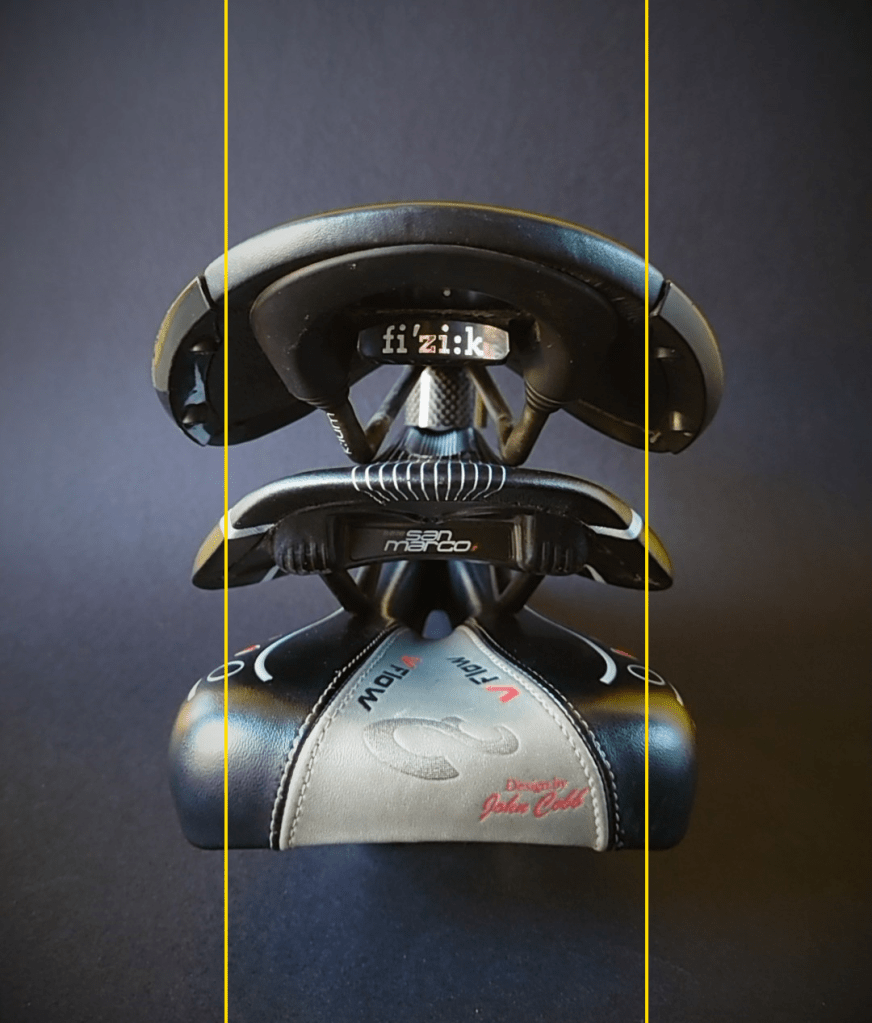
Relating this to saddle profile, the first thing that we need to be aware of is that saddles are three-dimensional. The width does not tell us very much about the way we interact with that particular saddle. Looking at the picture I started this post with, I have stacked three saddles. The top is categorised as ‘wide’ at an overall width of a bit over 150mm, the other two are ‘narrow’ with very similar widths in the region of 130mm. I have added parallel lines at an arbitrary width of approximately 110mm, this measurement is not important, I simply want to highlight the fact that for a given width of contact, the rider is going to experience vastly different sensation and pressure from each, regardless of width. We can observe from both of our top two examples, that the contact is quite sloped away from the centre, whilst at the same point, our third saddle offers a fairly flat interface. Neither is necessarily superior, only to demonstrate an often overlooked aspect of saddle design.
Another overlooked point for consideration is that of what I call the ‘sweep’ of the saddle. Again here are two of our examples from the first image, this time from above. I have again added some Microsoft Paint precision annotation lines, focussing on the way the width of each saddle ‘sweeps’ from nose to tail.

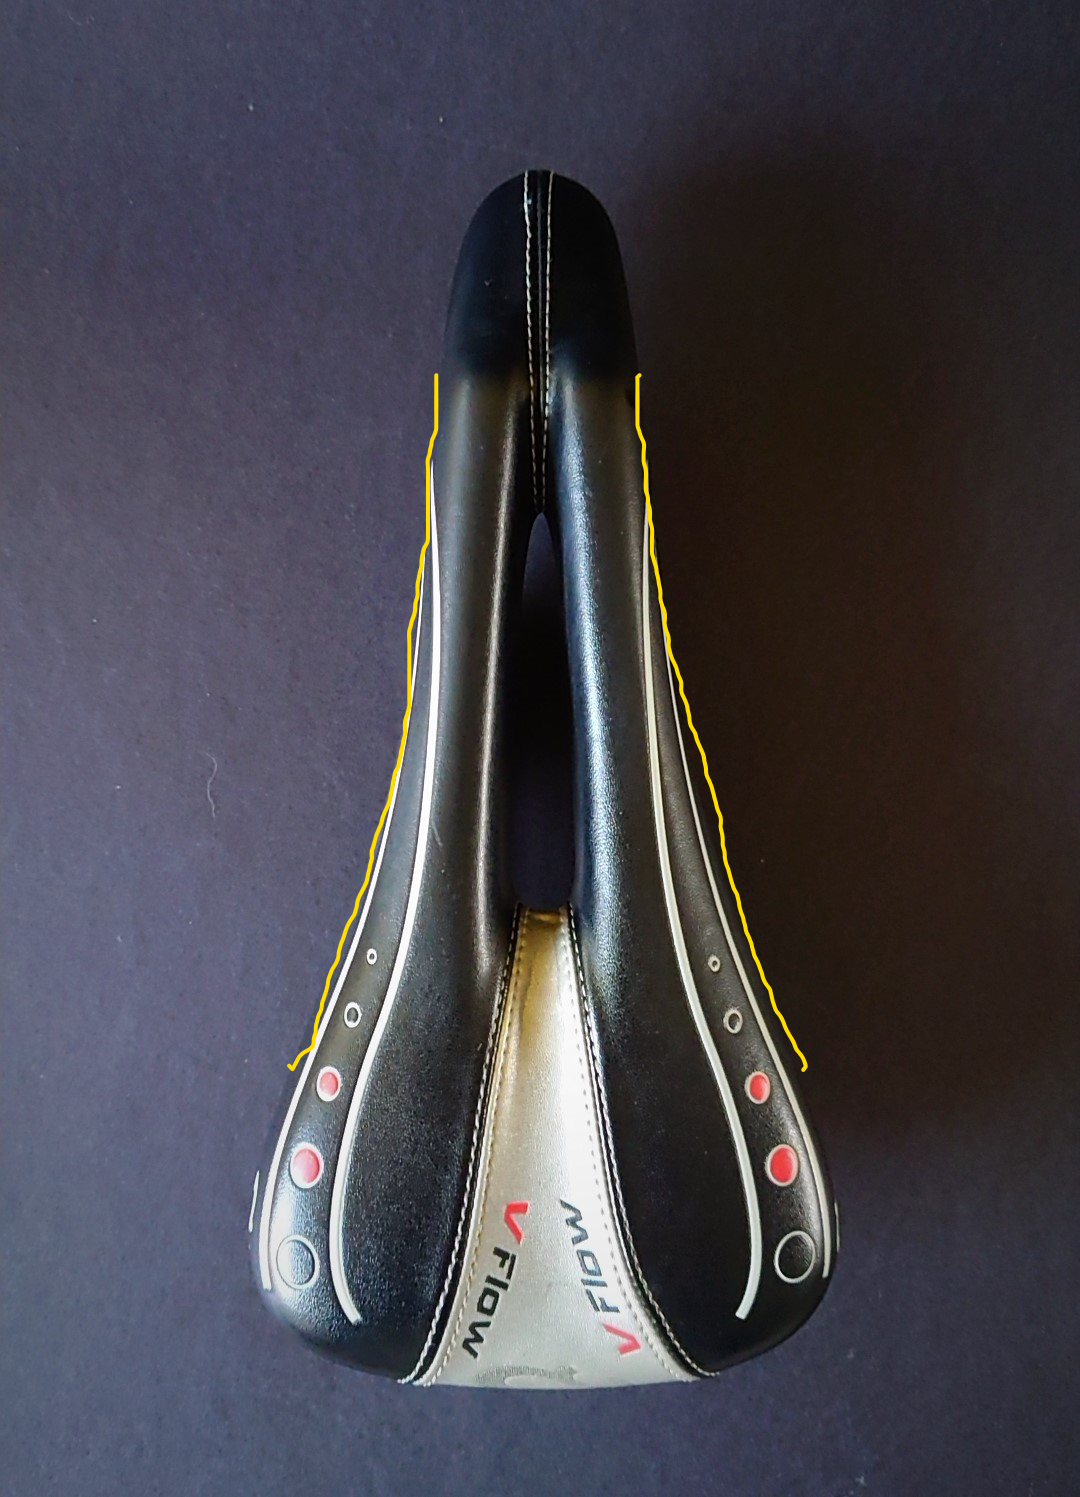
We can see that our first example offers a quite severe ‘sweep’ whilst our later saddle has a much more gentle transition. Again, both have their strengths. Our first saddle may offer a more ‘planted’ feel to a subset of riders for whom the width is a near perfect match for their pelvis structure, while the second has the potential to fit a wider range, providing more room for a rider to self-select their favoured width within the profile. These are two fairly extreme examples, with a lot of middle ground exisiting in the marketplace.
This post has run longer than I had anticipated. I have more material relating to saddle profiles to come, so look out for a future post with that. In the meantime, feel free to get in touch with any bike fit queries, or consider booking an individual consultation.

One Reply to “”